Showing posts with label The Great Outdoors. Show all posts

Tuesday, May 20

Curb Appeal Update!

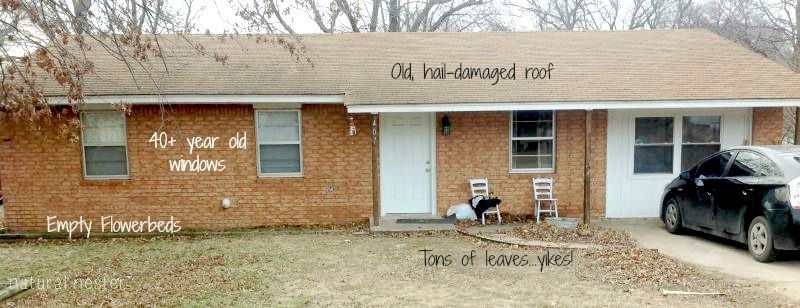
Let me tell ya', I've been so excited to share our progress with you! We've been working every single weekend and lots of evenings on our home and I love the way it's shaping up! Just to remember, here's what it looked like before...pretty pathetic! This was right after the winter that Would. Not. End.

And here's how it looks now!
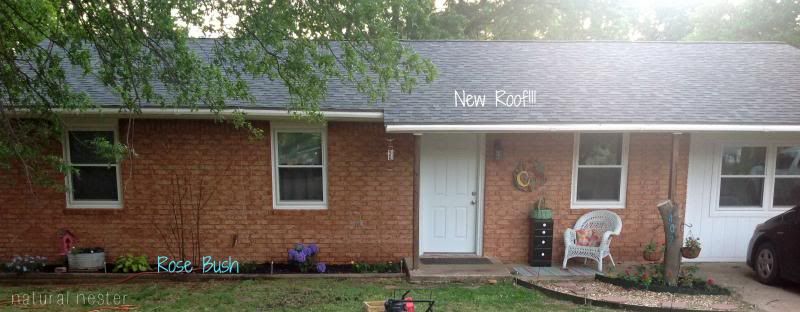

We added some perennials and mulch to the front bed. There's a rose bush in the middle that we moved from the side of the house. It never grows leaves or blooms until summer, so we can't really tell if it will make it yet. I hope so though...it's beautiful! And you can see on the far left where we moved a lilac bush.
  

Please excuse the garden hose. ;)  I added some extra annuals right by the front door. They're hard to see here, but we lined the bed with solar lights. It's so lovely at night.
 

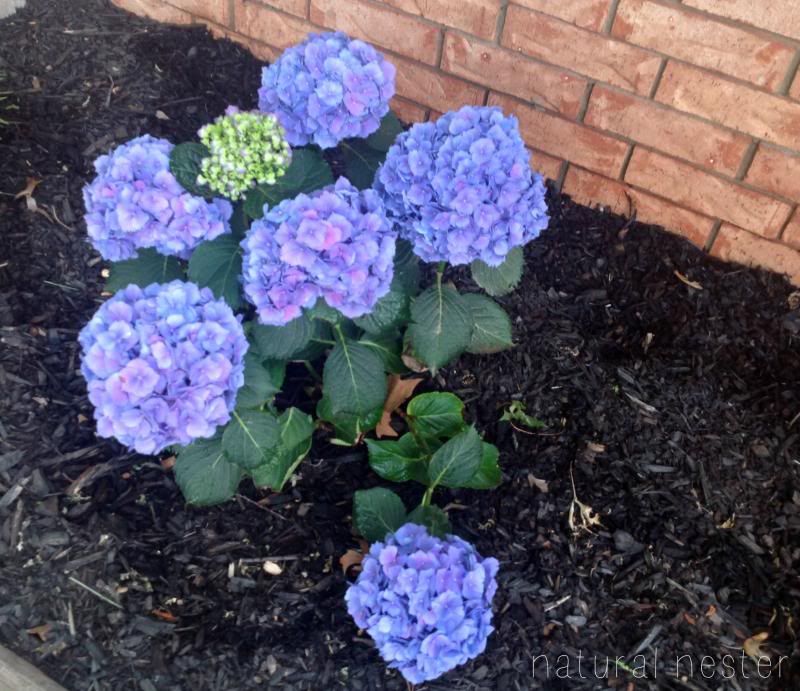
I love hydrangeas and I'm so happy to finally have my own! I'm trying to figure out where I can plant more!
 The front porch and a close up of our new windows! I never thought I'd say this, but I love these windows! They've only been installed a short while, but I can already tell how energy efficient they are. The wicker chair came from my Mom (thanks, Mom!) and I added my Easy DIY Outdoor Pillows.


And this. This is maybe my favorite thing of all! We have a tree in our backyard that died and Sweet Hubby has been cutting it down (for months, folks. Months.) This big limb was just laying in the yard, so I had him bury over a foot of it in this little triangular bed. I added our house numbers, 2 hooks from Wal-Mart and a couple of wire baskets with coconut liners from the dollar store. The entire thing only cost about $10! I added lots of annuals from our local FFA plant sale and more mulch.
 

Here's our to-do list to "finish" up the curb appeal (though really, is a home ever "finished"??)

Redo the rock walkway by the triangular bed.
Make a hose holder like this one.
Add some DIY shutters.

So, that's our progress so far! Obviously, I'm REALLY excited about how it all looks! :) It puts a huge smile on my face, every time we pull in the driveway or I come outside and see the gorgeous flowers and how tidy it all looks.


Friday, May 16

Lawn Chair Makeover

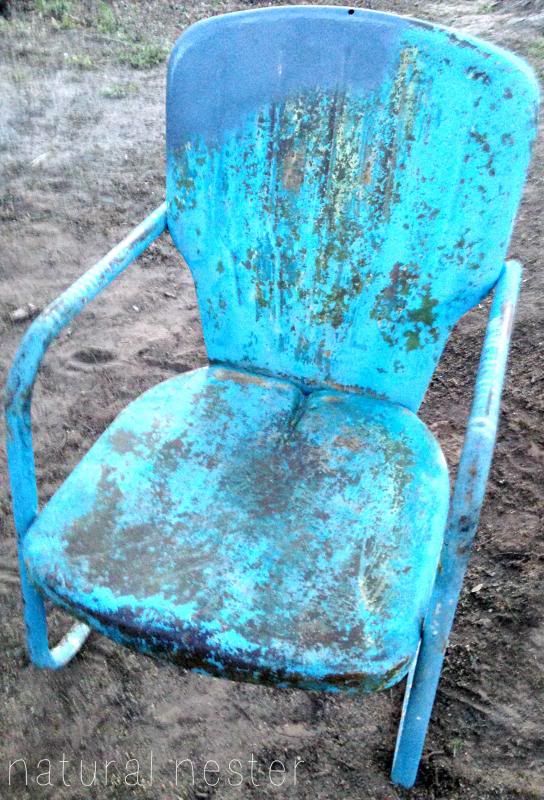
I inherited these metal lawn chairs from my great-grandmother Nana. There are 3 total and they each had layers (and layers!) of paint and rust. I wanted to fix them up, so after reading some tutorials online, Sweet Hubby and I got to work.


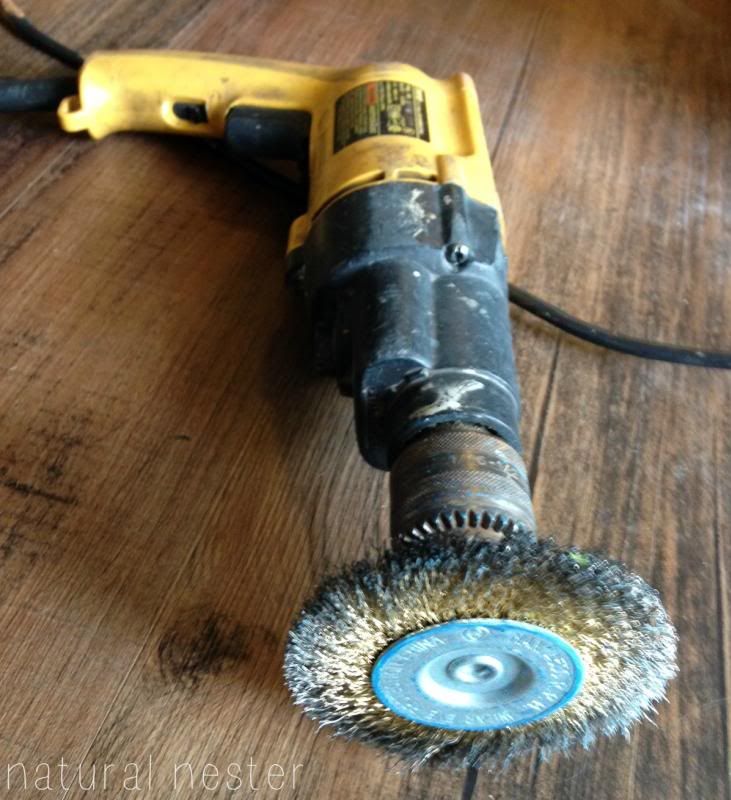
Sweet Hubby found this drill attachment at Lowe's, specifically for grinding off paint chips, rust, etc We chose to use this instead of chemical stripper. We didn't want to risk damaging the chairs, since they are so old and have sentimental value to me. You should wear eye protection if you use them...paint and rust chips were flying!


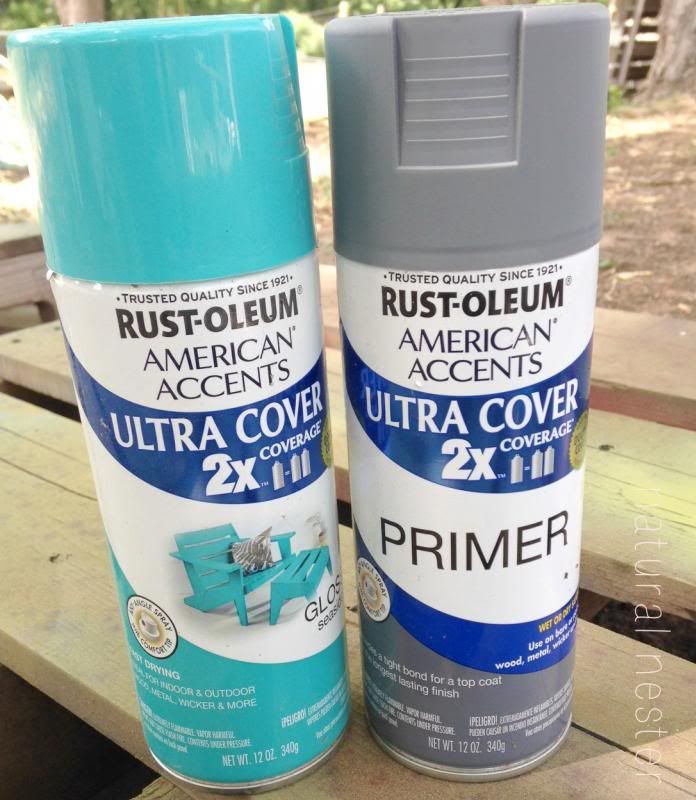
After (mostly) smoothing out the rough places, I hit them with a can of primer followed by a can of spray paint. These are the products I used. It took one can of each, per chair. I was really impressed with the coverage of them.


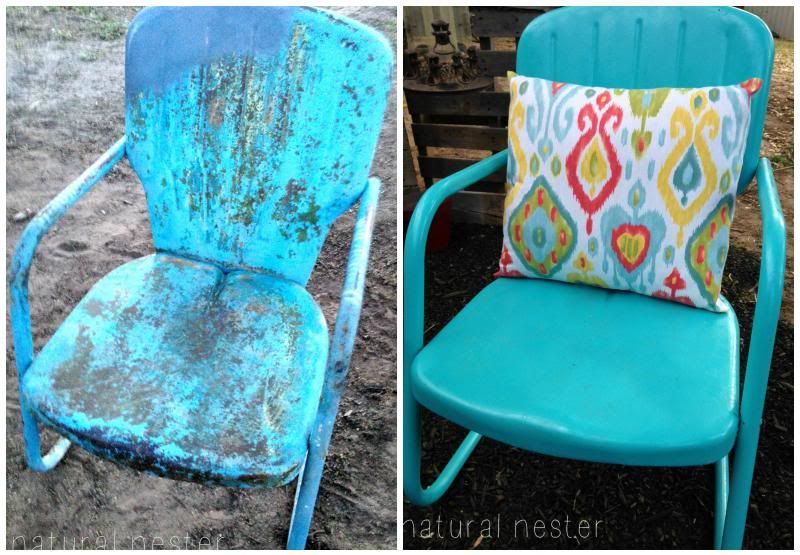
And the After!


I am thrilled with how they turned out. And I know my Nana would love that bright blue! I still can't get over the Before & After:


They look amazing on our new patio and I can't wait to share all the work we've done on it with you! Until then, I think I hear a glass of iced tea, a good book and that chair calling my name!


Monday, May 12

Strawberry Buckets

Last week I shared how I made a strawberry tower out of flower pots. View that post here. This week, I'm sharing how I made strawberry buckets! They were easy to make and I'm really happy with how they're working out in our garden. I'm sorry I didn't get more pictures of the process, but it's fairly simple.


For this project you will need:
  • Food grade bucket
  • PVC Pipe (1 to 1-1/2" diameter and 2-3" taller than your bucket)
  • Hole saw (1")
  • Drill with 1/8" bit
  • Landscape fabric
  • Duct tape
  • Potting soil
  • Strawberry plants

Use the hole saw to drill 1" holes in your bucket, leaving 4-6" between each hole and staggering the holes. I have 8 holes in the bucket pictured. Use the drill bit to drill 1/8" holes around the bottom of the bucket (drainage holes.) Set bucket aside.

Use the drill bit to drill 1/8" holes in the center section of PVC pipe (do not drill the top or bottom 4" of the pipe.) These are watering holes so drill several. Cut a piece of landscape cloth and wrap the pipe in it. Use duct tape to hold in place. The fabric keeps roots and dirt from clogging the water holes.

Stand the pipe up in the center of your bucket. Fill around the pipe with enough dirt to reach the first level of 1" holes. Insert strawberry plants through the holes and fill bucket with more potting soil to hold them in place. Continue this process to fill in all the holes. You can also add plants to the top of the bucket. Water your plants by filling the PVC pipe.

My cost:

  • Food grade bucket-- FREE from local restaurant
  • PVC Pipe--FREE from my brother's job (scrap piece)
  • Hole saw--about $15 (bought set from Lowe's)
  • Drill with 1/8" bit--FREE from my husband's tool kit
  • Landscape fabric--$3 from dollar store
  • Duct tape--FREE from stash
  • Potting soil--$12 from dollar store
  • Strawberry plants--about $10 from local greenhouse
My out-of-pocket cost was $40 to make 2 buckets, but that included the hole saw kit (can be used for lots of projects around the house!) and I have enough landscape fabric for a few other projects, too. What a great bargain!

~~~~~~~~~~~~~~~~~~~~~~~~~~~~~~~~~~

I hope the directions are clear. If you have questions, feel free to ask in the comments. I might make another one or two buckets this week and will take pictures of the process for you, if anyone is interested.

Are you planting strawberries this spring? Will you eat them straight from the garden or put them into recipes?


Wednesday, May 7

Strawberry Tower

My girls LOVE strawberries. But there's a problem...we're trying to eat more organic produce and avoid the Dirty Dozen, which includes strawberries.  And organic strawberries can be really expensive! The best option is to grow them ourselves.

I found a flat of strawberry plants at my favorite local greenhouse for $20, 36 plants total. Some of them already had berries on them! I decided to plant them a few different ways to see what would work best. To start with, I spray painted some ugly pots with primer and then glossy red paint (trying not to get paint inside.)
 

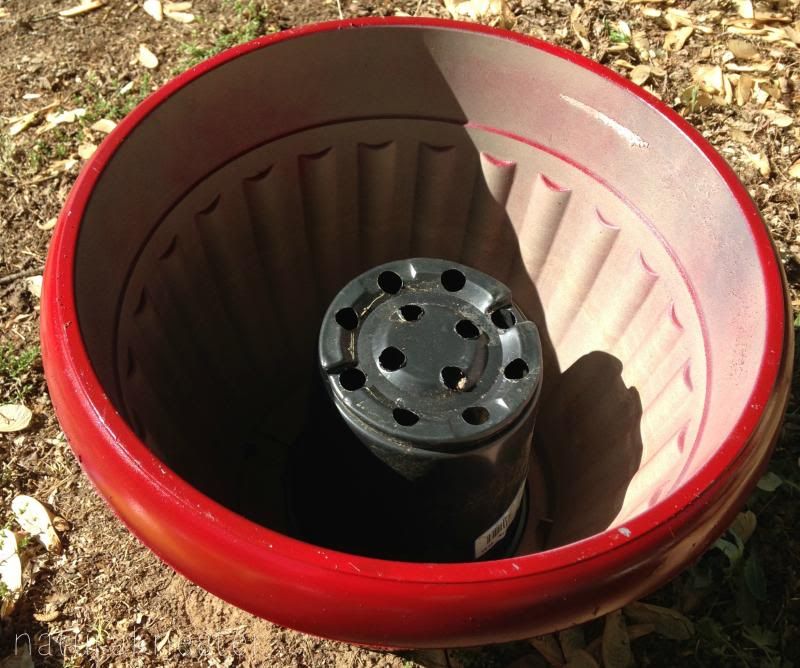
I placed a sturdy plastic greenhouse pot upside down in the largest red pot and filled in around it with dirt. The greenhouse pot takes up space, making the strawberry tower lighter weight because it uses less soil. It also supports the top pot of the tower.


After filling the pots with soil, we added some of our strawberry plants and watered well. Tomorrow I'll show you where we planted the rest of the berry plants. We've placed the tower by our patio, where it can get enough sun. My girls love checking the tower everyday to see if there are more berries, ripe and ready to eat!


Are you planting a garden this year? What are you growing?

I'm sharing this post over at:

http://www.abowlfulloflemons.net/2014/05/one-project-at-a-time-5614.html

Friday, April 11

Easy DIY Outdoor Pillows


Have you seen the price of outdoor pillows lately? Yikes! Talk about a budget buster! We have major renovations going on elsewhere and I wanted to keep my spring decor thrifty, so I'm excited to share this project with you today!


All I used to create these cute little pillows was an old sleeping pillow (seriously pathetic, isn't it? Squished, uncomfortable, unloved...it's perfect for this project!) I found a yard of fabric in my craft stash to use. I made envelope closure pillows using this tutorial, the same one I shared earlier this week. I love it because it's so fast and easy! (Seriously, it's just 4 straight seams...you can do it!) I cut the pillow in half, fluffed the stuffing and filled my covers. 

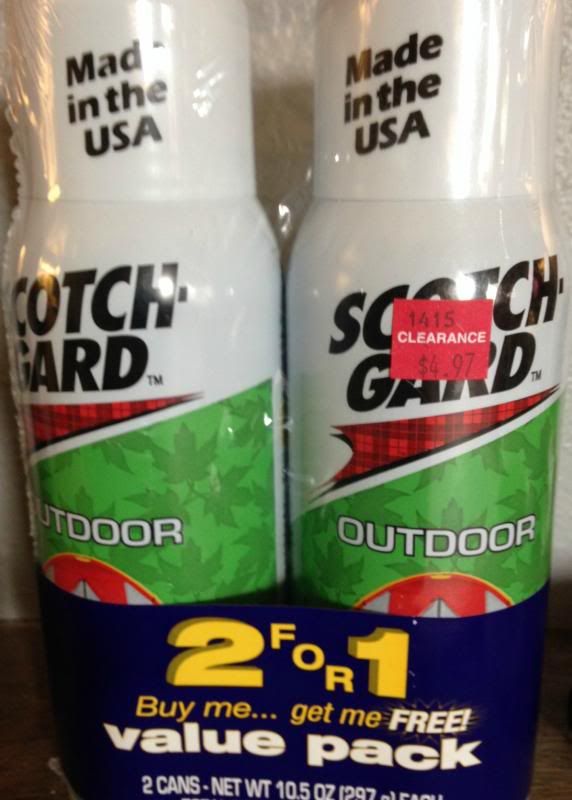
And now for the secret weapon:


Did you know they make this product? I didn't either, until I saw it at Joann's. Two cans for $4.97? What a steal! I gave the pillows a quick spray and they were ready for the porch! Use in a well ventilated area...it's stinky when wet, but dries quickly. It also doesn't change the look of the fabric at all!


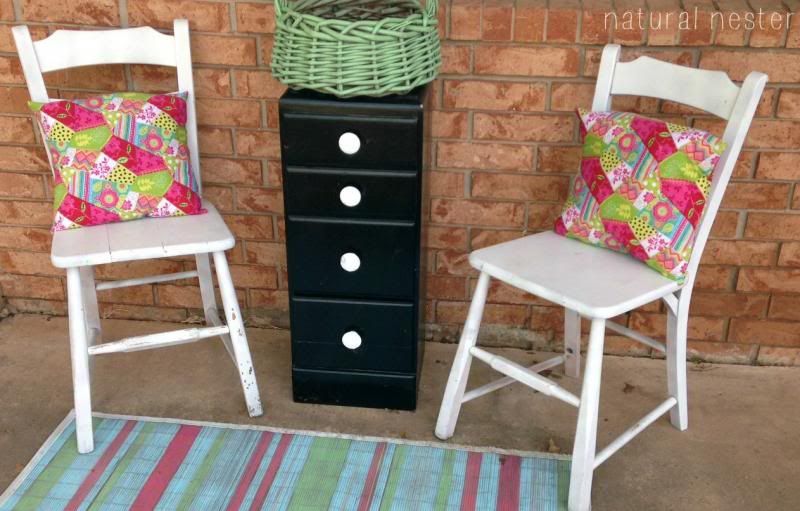
In less than 30 minutes, I had two custom pillows for our front porch and it cost me much less than buying new. Give it a try and add some fun to your porch or patio!


Tuesday, April 8

Children's Garden Progress!


I shared awhile back about some ideas I had for our outdoor play space.  You can see the inspiration I had gathered by reading this post.   I wanted to stop in and share the progress we've made so far this spring.


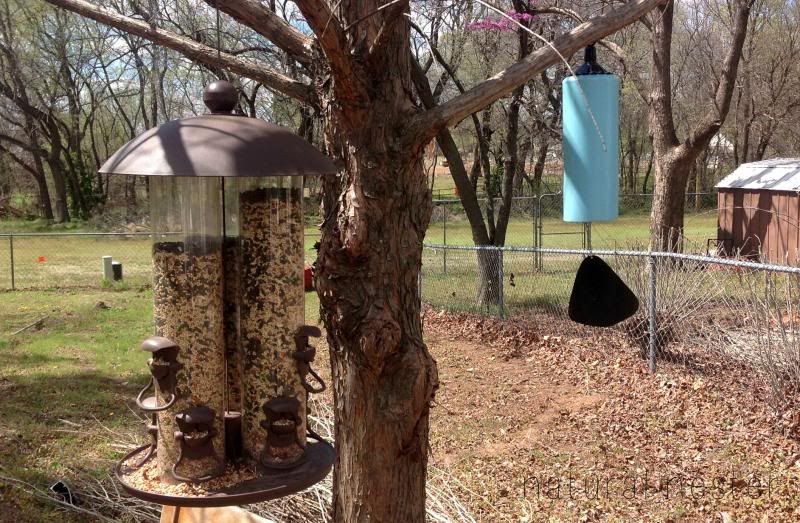
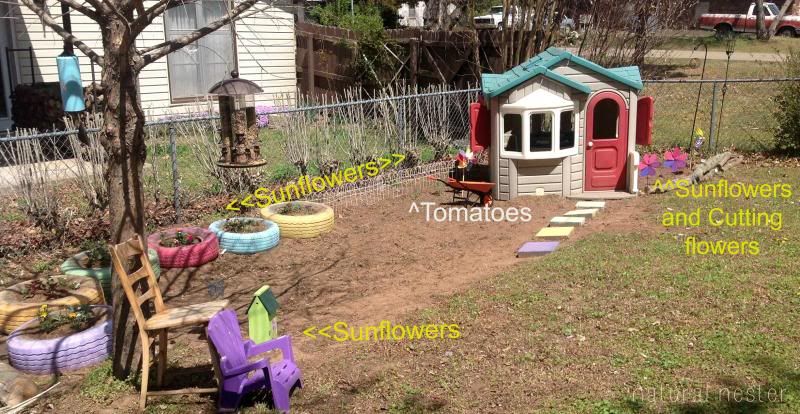
Michael (Sweet Hubby) started by tilling up the play area and moving the play house over to the newly leveled spot. He added the stepping stones from our fire pit area and hung the bird feeder and wind chime from the tree. Our neighbor made the wind chime, so it's a special addition to the area.


I was able to get some old tires from my Dad and we let Miss A and Gigi choose spray paint colors. The colors they chose were from Krylon. I have never liked Krylon spray paint, but this time we bought the ColorMaster Cover Max and it worked great! The coverage was fantastic and I still have half a can of each color to use on other details through the play area.


In our area, we have a farm and garden store called Atwoods. I always like shopping there for plants because they have great sales in the spring. This weekend, 3-pack annuals were only 69c each!! So, we let the girls go crazy and choose as many as they wanted. I also picked up some for our front flower bed and Miss A even picked out a bunch of tomato plants.


Here's what you CAN'T see. We planted giant sunflower seeds all around the perimeter (except the front/right side where the girls enter the play area.) Hopefully they'll provide some privacy and shade as they grow over the summer. Miss A planted 3 tomato plants on the left side of their play house (easy snacking on cherry tomatoes while they play!) And behind the play house, we planted more sunflowers and a couple packets of "cutting garden" flowers. Everything we planted is supposed to attract hummingbirds and butterflies!


We still have a few more projects in mind for this, but so far our girls love it and want to spend every waking moment here! I'd call that a success!

I'm sharing the Children's Garden over at:

http://www.abowlfulloflemons.net/2014/05/one-project-at-a-time-5614.html

Friday, February 21

New Fence


When we moved in, we had to remove a section of the chain link fence because it was being overrun by honeysuckle vine. It had mangled the wire fencing and was about to engulf the neighbor's fence and after removing it, we haven't had a fence there since. This weekend, we decided enough was enough and Sweet Hubby installed the new fence.

On the south/left side of this pic, you can see where the old chain link fence was.  The posts and the top rail were still there. Tacky, huh? *blushes* :) And that naked flower bed? I know...it desperately needs help. I'm working on a post that shows you my plans to add curb appeal this spring.

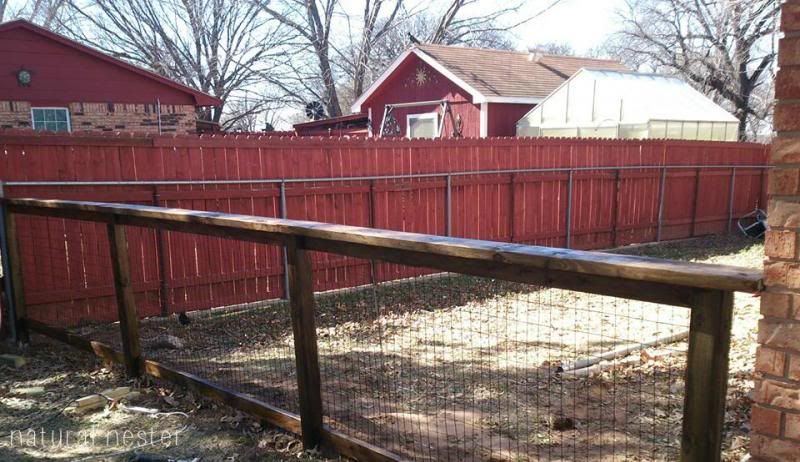
And the finished fence! We chose black coated metal fence with wooden posts and top rail. Sweet Hubby put it all together and stained it to match the posts on our front porch. (The red privacy fence is our neighbors and we didn't want to match it.) And, just a note, the spot on the other side of this fence is where the vegetable and herb garden is going soon! I can't wait to show you that progress!

Sweet Hubby used 4x4 posts, 2x4s and a 2x6 for the top rail. The rail is wide enough that I can put some flower boxes on top. I also plan to grow morning glories or something similar on the fence this spring and summer. We're going to do the same type of fence on the north side of our house too, but we have to remove some hedges first.