
See info at the bottom for the Craft Supply Swap Linky Party!
~~~~~~~~~~~~~~~~~~~~~~~~~~~~~~~~~~~~~
If you're visiting from one of these places, welcome! I hope you'll have a look around and enjoy this really simple project!

And more spray paint projects here:

 Did the sneak peak yesterday give away what I've been working on? I've been wanting a stepstool for my kitchen for quite awhile. I've had my Mom's on loan since last summer and I needed to give it back to her and get my own, but I kept forgetting to buy one. I'm glad I never remembered because while hitting yard sales last weekend, I found this! This little step stool only cost $3 and into the truck she went. I think my Dad might have rolled his eyes.
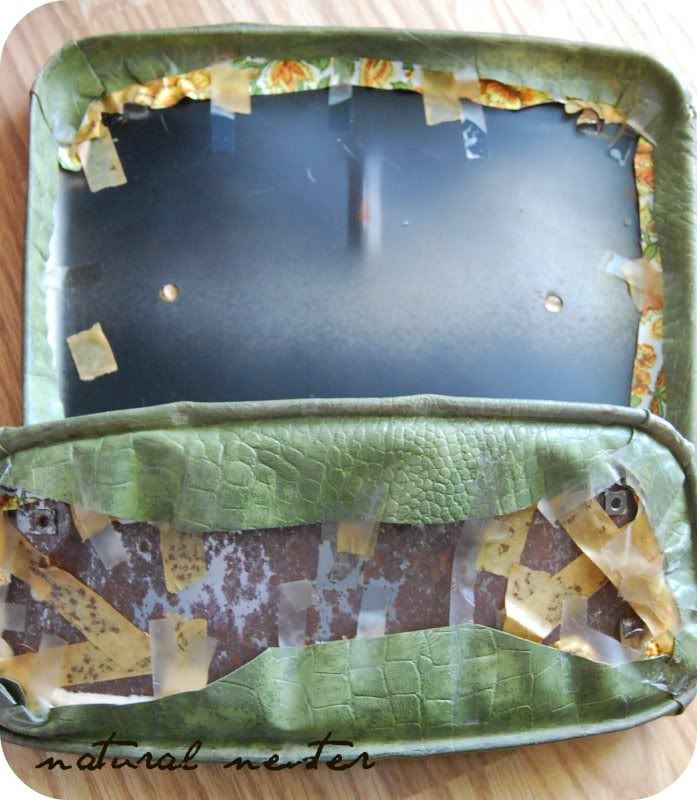
 Sweet Hubby helped me pry the upholstered pieces off and this is what I found. Yuck and Double Yuck!! This was well into the second dimension of Gross. I removed everything, including the padding...I just couldn't stand the thought of leaving that nastiness in there.
 I primed and painted the frame, recovered the seats and voila! A beautiful new little step stool for my kitchen! I'll admit, this isn't a super fancy redo or particularly amazing...but it's pretty and functional! Plus, I learned a valuable lesson...I will never buy Krylon spray paint again. It was very thin and even after a whole can, it didn't cover well. I bought 2 cans of Valspar spray paint to finish (but had to get a different color) and less than one can later, had a finished project! (And as a note, I did not receive compensation from Valspar to say that!)
BTW, How do you like my model? Miss A insists on being in nearly every photo I take now. And given her poses, I'm thinking she may be destined for a spot on the Price is Right. (And what about those piggy pajamas? I just love them! The fact that they're a near perfect match to the stepstool is purely coincidence! Hahaha!)
I'm hosting my first linky party! Check out the details for the Craft Supply Swap Party here!
Note to Julie (from the comments): I'm sorry I didn't take better during shots...I was afraid they'd be boring! Sweet Hubby had to help me remove the screws from the back of the seat so that I could remove that top back-support piece. The seat was just firmly pressed onto the frame part.
Once the back and seat were removed from the stool frame, I had to use a flat-head screwdriver to pry loose the two parts of each piece: the metal back piece and the upholstered top/front piece. On my stool, the fabric was just held in place with tape, so when I "upholstered" it, I used the same technique. I used unbleached muslin fabric to cover mine because my original intent was to then stencil an image onto the seat and back. I've decided not to do that and to instead make slipcovers in a few different patterns for when I want to change the look. Right now though, I really love the simplicity of the stool the way it is. I hope that helps...if you have more questions, ask away!


3 comments:
Found you on SkiptomyLou! You stool stood out to me because I have an old metal stool from my gram's kitchen that I have been wanting to redo. Yours turned out SOOOOOO cute! I LOVE the blue and white...so fresh. I will keep in mind the Krylon issue...yikes.
Thanks for sharing your redo! You are now bookmarked!
I have the same stool I picked up second hand for $5, but can't figure out how to recover it..after viewing this I feel the need to go figure it out! What did you use for fabric to recover it with?
I love it...the colors and freshness just jump out at you now! well done!
www.northerncottage.blogspot.com
Post a Comment