
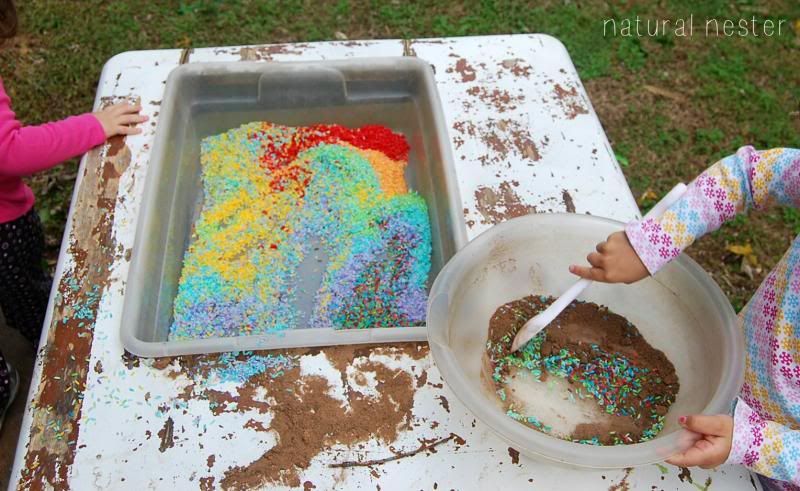
Last year, Sweet Hubby and I made a sensory table for our girls out of an old dining table. (I wasn't blogging then, so we didn't take before pics.) It was solid wood, so he just cut down the legs, I painted it and then Hubby cut a square out of the top for a plastic bin to rest in. We off-centered the hole, so there would be plenty of work space on the table top. It stayed outside on our back deck which was perfect for water play, colored rice, sand, etc. This is the best before pic I could find, but you can see how beat up the top was after it lived in Oklahoma weather.
With winter coming, I knew it wouldn't get used once it turns bitterly cold. But the height is perfect and I thought it was still functional so I decided to re-purpose it...again!
We don't own a lot of power tools so I borrowed our friend Dave's sander (thanks Dave!) I'm either a big weenie or it really has some power to it because it nearly ran away with me, but I got the top sanded. I also had to use some wood putty and a metal bracket to fix that thin side (it was cracked before, but broke during sanding.) It's possible that I uttered more than one "Tim Taylor grunt" during the process. ;) It was cloudy so it's hard to tell, but the legs were purple.

I used Valspar spray paint (Indigo Streamer, a gorgeous navy blue) for the legs. The top got several coats of white. I used some sand paper to rough up the edges and some on the top, so it would age well. And yes, that's where we "hide" Bo's food (our lhasa apso.) I added the girls' most frequently used art supplies to the bin.
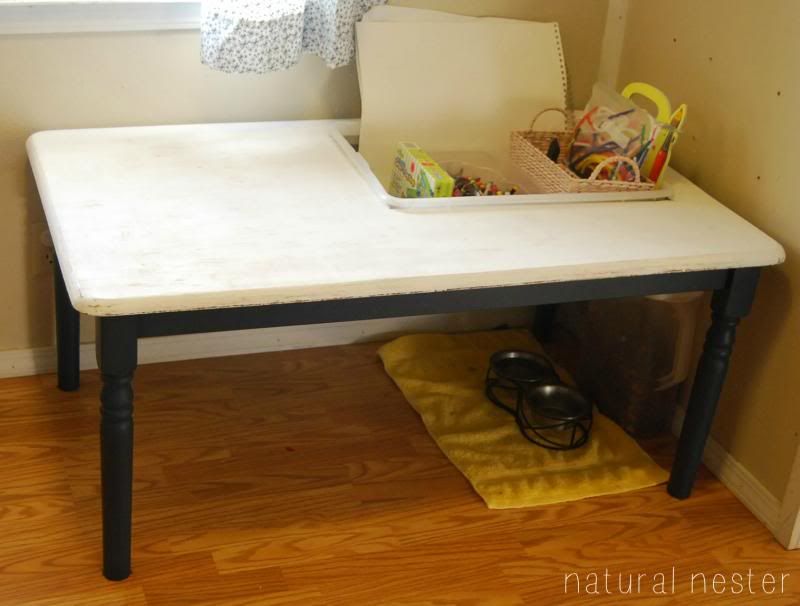
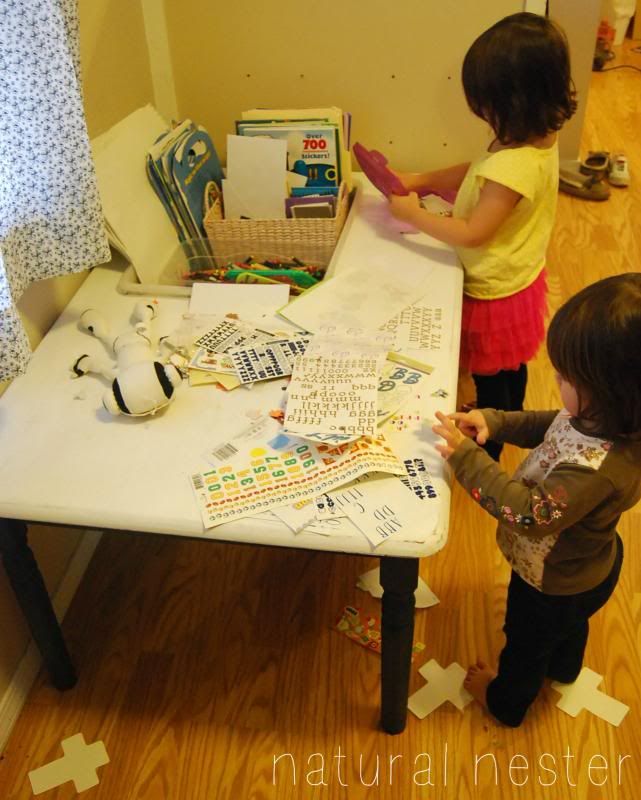
It didn't take long for the kiddos to start using it! They LOVE it! It is right next to our kitchen, so they can create while I cook or clean. It's the perfect height for standing, but I'm on the lookout for some wooden chairs to go with it.
I'm sure it will get plenty of use over the next few months of cold weather, so it is well worth the little bit of $$ it took to fix it up and restore its beauty! And in the spring, we can move it back outside for more water, sand and colored rice play!
Cost Breakdown:
2 cans of Valspar gloss white spray paint $8
1 can of Valspar satin Indigo Streamer spray paint $4
1 sand paper band $6
Wood putty, screws & metal bracket to fix end piece (had on hand) $0
Total Cost: $18
Are you doing any fun projects to prep for winter?

No comments:
Post a Comment